How to Repair Burnt Tracks on ECM PCB (Step-by-Step Professional Guide)
· ECM Repair – Diagnostics & Maintenance
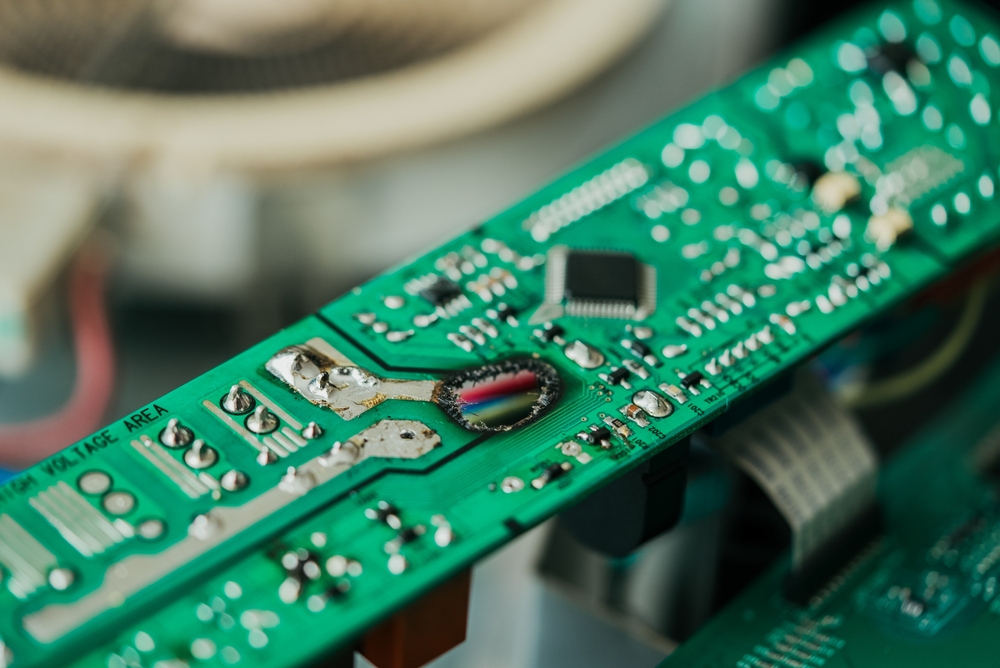
Burnt PCB tracks (circuit paths) are among the most common ECM failures. These tracks carry electrical signals across the board, and when they burn, the ECM loses communication with the components it controls.
What are PCB tracks?
PCB tracks are thin copper lines on the board. They act like wires connecting the components to each other.
Why PCB tracks burn
The common causes are a voltage surge, a short circuit, water damage and overheating. These are very common in Indian conditions.
Symptoms of burnt PCB tracks
- No injector signal
- No spark
- Car not starting
- Intermittent issues
- No communication with the ECM
Tools required
The basic tools are a soldering iron and a multimeter. For advanced work you also need a hot air station and a microscope.
Step-by-step repair process
Step 1: Identify the burnt track
Look for black marks or a broken copper line, and use magnification.
Step 2: Clean the area
Use isopropyl alcohol and a soft brush to remove carbon deposits.
Step 3: Test continuity
Use the multimeter to check whether the track is broken. No continuity means the track is damaged.
Step 4: Remove the damaged section
Gently scrape the burnt area until clean copper is exposed.
Step 5: Prepare a jumper wire
Use thin copper wire and make it follow the same path as the original track.
Step 6: Solder the jumper wire
Connect both ends and make sure the joint is strong. The jumper now replaces the burnt track.
Step 7: Secure the repair
Use insulation and PCB coating to protect the repair from future damage.
Step 8: Test the circuit
Check that continuity is restored and that there is no short circuit.
Step 9: Test the ECM
Check that the signals are restored and the engine starts.
Real workshop case study
A car came in not starting. The diagnosis showed no injector signal, and inspection found a burnt PCB track. After a jumper wire was added, the engine started successfully.
Advanced case study
In another car the problem was an intermittent engine issue. The diagnosis found a partially burnt track. Once it was repaired, the performance became stable.
Common mistakes to avoid
- Not cleaning properly causes a poor connection.
- Using thick wire can damage the PCB.
- Poor soldering leads to a loose connection.
- Ignoring the root cause means the problem will repeat.
Pro tips
Always fix the root cause, such as voltage or wiring issues, use proper tools and test thoroughly. Using magnification also improves accuracy.
Indian market insight
The common causes in India are voltage fluctuations, water damage and poor wiring, so there is high demand for this repair skill.
Cost and profit
The repair cost is ₹2,000 – ₹10,000, while the material cost is only ₹50 – ₹200. That gives a very high profit margin.
Frequently asked questions
Can burnt PCB tracks be repaired?
Yes, they can be repaired using jumper wires.
Is the repair permanent?
Yes, it is permanent if it is done correctly.
What causes track damage?
Voltage, short circuits and heat cause track damage.
Can beginners repair this?
Yes, beginners can do it with practice.
Is it profitable?
Yes, it has a very high margin.
Summary
Repairing burnt PCB tracks is one of the most valuable practical skills in ECM repair. Identify the fault correctly, repair it precisely and fix the root cause. Doing this lets you save ECMs, earn more and build expert-level skills.
Watch our workshop videos on the Reynlab YouTube Channel. You can also explore our automotive training programs at www.reynlab.com/our-courses.
How Does an Engine Control Module Work? (Step-by-Step Simple Explanation)